


Why do testing in the first place?
Let's say that you are working on a signup form and have just added a couple of fields with some functionality. Testing it manually means you need to go through the whole form, fill out every field & press all the buttons in the correct sequence to ensure that your new changes do not break your app. Sure, it's reliable since you built it, but the longer the form gets, the more time-consuming it becomes to fill everything out!
Wouldn't it be great if there was a way to spend less time testing and more time building?
Well, with React Testing Library (RTL) and Jest, there is! RTL and Jest are great tools for automating your manual tests, saving you precious time, and giving you peace, security, and confidence that your new changes won't break the rest of your app.
Let's take a closer look!
The paradigm of frontend testing with RTL
One more thing I should mention before we dive in is how you should think about testing with RLT and how to structure your tests.
It's a good practice to take the user's perspective when writing your tests. You want to test exactly how you think a user will interact with your app. It is a good idea to write your tests as all the interactions in a sequence that a user might make when using a particular component or the app as a whole.
Start with a question. When a page loads, what actions will a user take to achieve a specific outcome? Let that question be your guide from start to finish. Then you write your tests in that sequence to mimic those interactions.
Okay, let's start. For real, this time.
Setting up React Testing Library and Jest
In this tutorial, we will be using Next.js. To create our Next app with RTL and Jest already configured, run this line in your terminal :
npx create-next-app@latest --example with-jest with-jest-app
Here is a link to the repo for this tutorial if you want to follow along: https://github.com/sbelka-1703/react-testing-tutorial
The App that we will be testing
This is a very simple component that conditionally renders content being passed as children when a button is pressed, and it hides the content when the button is pressed the second time.
In my folder structure I am putting the testing file ShowContentButton.test.tsx inside the components/ShowcontentButton folder
And here is the code:
// ShowContentButton.tsx
import { useState, ReactNode } from "react";
import styles from "./ShowContentButton.module.css";

interface ShowContentButtonProps {
  children: ReactNode;
}

export const ShowContentButton = ({ children }: ShowContentButtonProps) => {
  const [isShown, setIsShown] = useState(false);

  return (
    <div className={styles.body}>
      <button
        className={styles.button}
        onClick={() => setIsShown((isShown) => !isShown)}
      >
        {isShown ? "Hide" : "Show"} Content
      </button>
      <div className={styles.text}>{isShown && children}</div>
    </div>
  );
};
// pages/index.tsx
import { ShowContentButton } from "@/components/ShowContentButton/ShowContentButton";

export default function Home() {
  return (
    <div>
      <ShowContentButton>
        <p>Some Text</p>
      </ShowContentButton>
    </div>
  );
}
Writing our test
We finally have everything set up so let the testing commence!
In our ShowContentButton.test.tsx file we need to import 3 essential things:
The component that we are testing(
ShowContentButton.tsx)renderwhich will render theHTMLof the componentscreenwhich will interact with everything rendered by therender()function
//ShowContentButton.test.tsx
import { ShowContentButton } from "./ShowContentButton";
import { render, screen } from "@testing-library/react";
Once we have 3 three things imported, we can start writing the test.
A test has two main parts:
test(" Part 1 -- Description of the test", () => {
  // Part 2 -- This is where the code for will go
});
Part 1 does not impact how the test will run, you can put anything there, and the test will perform the same way regardless. Part 2 will most definitely have an impact, and that is where you write the code for your test.
Okay! Equipped with this knowledge let's render our ShowContentButton and see if the test passes. We are going to use the render() function that we imported earlier. We will also pass "Some Text" as children to be rendered on the page when the button is pressed the first time.
//ShowContentButton.test.tsx

import { render, screen } from "@testing-library/react";

import { ShowContentButton } from "./ShowContentButton";

test("Our ShowContentButton should render", () => {
  render(<ShowContentButton>Some Text</ShowContentButton>);
});
To run the test type this command in your terminal:
yarn test --watch "ShowContentButton"
This command will run jest in watch mode. What that means is that jest will look for .test file with the name "ShowContentButton" . If that test name exists, it will run that test. What is also neat is that every time you change something in the file and hit save, the test will automatically rerun, and you will get a pass or fail immediately.
If everything works, you should see the pass message in this beautiful color green:
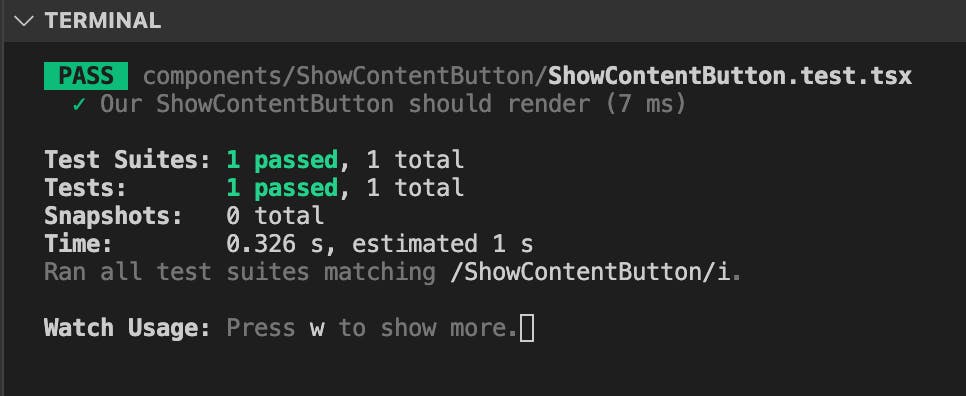
But what if we want to test more than if the component just renders on the page?
Let's write a test that presses the button in our component and checks if the content is being displayed, but if you press the button the second time, the content will disappear.
To do these interactions, we would need more tools from our testing toolkit.
//userEvent will be one of those tools
//userEvent would need to be imported with
import userEvent from "@testing-library/user-event";

test("Using userEvent", async () => {
  //userEvent also requires a setup at the beginning of every test
  const user = userEvent.setup();

  /*
Another thing that needs to be done is we need to define our button to click it with our user.click() method.

To find that button we would use the screen method to access everything that the render() function returns. Specifically, we would use screen.getByRole() method.
To read more about this method follow  this link:
https://testing-library.com/docs/queries/byrole/

*/
  const button = screen.getByRole("button");

  /*
  -userEvent also works best when it is called in an async manner.
  - When everything above is complete, call userEvent with user.    followed by any method available to the userEvent.

So for us, it will be user.click()
*/
  user.click(button);
});
Another helpful piece of information is that our button also has a name property. That name property is Show Content. When we refer to a button, we can be specific and refer to a particular button, not just any.
Although we only have one button in our case, this information is still helpful to know.
This is what it looks like with that edition:
const button = screen.getByRole("button", { name: "Show Content" });
The last thing we need to do is assert that the text shows up when our button is pressed.
We make an assertion with an expect() statement. In that statement, we can grab a specific piece of text by using getByText() method. Lastly, we finish our assertion with .toBeInTheDocument(). So this is what it looks like when you put all of that together --> expect(screen.getByText("Some Text")).toBeInTheDocument();
We are almost done!
The only thing left to do is to test that the second press of the button makes the content disappear.
Unfortunately, we can't use our getBy methods to do this. Since all those methods will be looking for something that is not there, the test will always fail.
To avoid that, instead of using getBy we are going to use queryBy which is the only method to look for something that is not there.
Also, because "some text" text will not be there at the end of our assert statement we have to add the .not , so it becomes this -->
expect(screen.queryByText("Some Text")).not.toBeInTheDocument()
With all of that information, now our test should look like this:
//ShowContentButton.test.tsx

import { render, screen } from "@testing-library/react";
import userEvent from "@testing-library/user-event";
import { ShowContentButton } from "./ShowContentButton";


test("When a user presses the button, they will see some text", async () => {
  //Running this setup at the beginning of the test lets us use the     //userEvent methods( like user.click())
  const user = userEvent.setup();

  //The component needs to be rendered before we can start testing //anything else in that component
  render(<ShowContentButton>Some Text</ShowContentButton>);

  //We grabbing our button by using screen.getByRole. The role is       //referring to its aria role: //https://www.w3.org/TR/html-//aria/#docconformance
  const ourButton = screen.getByRole("button", { name: "Show Content" });

  //userEvent is an async method, hence the await. Above we defined //our button and bellow we are clicking on it using the userEvent as //user from the setup on line 8
  await user.click(ourButton);

  //Here we are asserting that the text "Some Text" is being seen by    //the user or that it is rendered to the page or the Document
  expect(screen.getByText("Some Text")).toBeInTheDocument();

  //We click the button to hide the content or the text "Some Text"
  await user.click(ourButton);

  //We assert that the content is no longer there with queryBy
  expect(screen.queryByText("Some Text")).not.toBeInTheDocument();
});
This test does pass! And we can be sure that if we do anything to break this functionality, our test will let us know by failing.
Conclusion
The information covered here is just the tip of the iceberg regarding front-end testing. But this tutorial should give you a nice foundation for getting started with testing with RTL. The tests seen here are just unit tests that test the functionality of a single component. Integration testing involves multiple components working together, which could be a page, a flow, or just the general interface for an app. You can see an example of an integrative test in this PR that I wrote: https://github.com/Soil-labs/eden-app-2-FrontEnd/pull/752.
Thank you for reading my article. I hope this information was helpful to you!
Useful Links
RTL official docs: https://testing-library.com/docs/react-testing-library/intro/
Testing learning material from RTL Docs: https://testing-library.com/docs/learning
The repo for this tutorial: https://github.com/sbelka-1703/react-testing-tutorial
Aria accessibility roles: https://www.w3.org/TR/html-aria/#docconformance
Test examples from the with-heart frontend wizard: https://github.com/chakra-ui/chakra-ui/pull/488
My PR for unit testing: https://github.com/Soil-labs/eden-app-2-FrontEnd/pull/734
My PR for an Integrative Test: https://github.com/Soil-labs/eden-app-2-FrontEnd/pull/752
Udemy course that I took on RTL + Jest testing: https://www.udemy.com/course/react-testing-library/